WordPress comes with a drag and drop menu interface that you can use to create header menus, menus with dropdown options, and more.
In this step by step guide, we will show you how to easily add a navigation menu in WordPress.
Creating Your First Custom Navigation Menu
Step 1: To create a navigation menu, you need to visit the Appearance » Menus page in your WordPress admin dashboard.
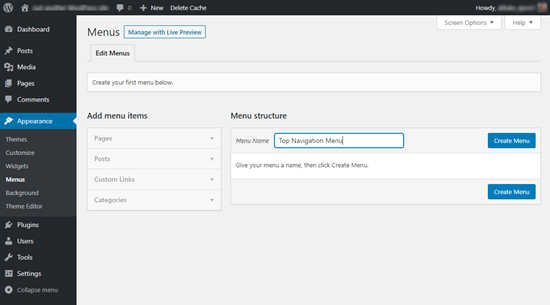
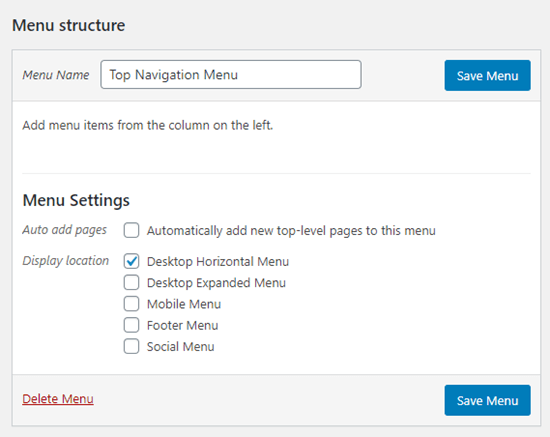
Step 2: First, you need to provide a name for your menu, like ‘Top Navigation Menu’ and then click the ‘Create Menu’ button. This will expand the menu area, and it will look like this:
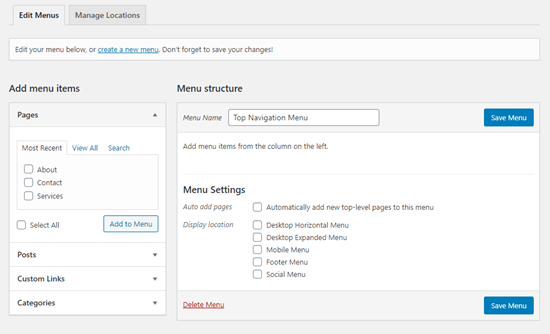
Step 3: Next, you can choose the pages you want to add to the menu. You can either automatically add all new top-level pages, or you can select specific pages from the left column.
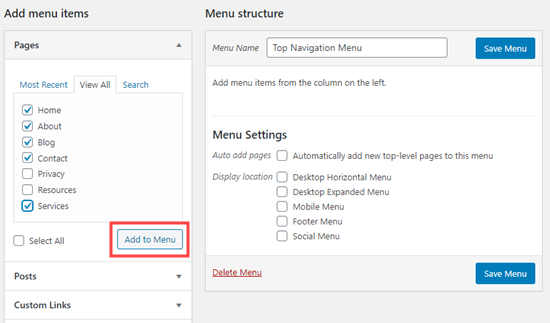
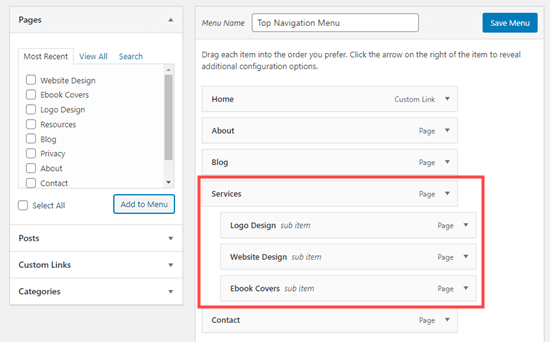
First, click the ‘View All’ tab to see all your site’s pages. After that click the box next to each of the pages you want to add to your menu, and then click on the ‘Add to Menu’ button.
Step 4: Once your pages have been added, you can move them around by dragging and dropping them.
Note: All menus have their items listed in a vertical (top to bottom) list in the menu editor. When you put the menu live on your site, it’ll either display vertically or horizontally (left to right), depending on the location you select.
Most themes have several different locations where you can put menus. In this example, we’re using the default 2020 theme, which has 5 different locations.
After adding pages to the menu, select the location where you want to display the menu and click on the ‘Save Menu’ button.
Tip: If you’re not sure where each location is, try saving the menu in different places, then visiting your site to see how it looks. You probably won’t want to use all the locations, but you might want to use more than one.
Here’s our finished menu on the site:

Creating Drop-Down Menus in WordPress
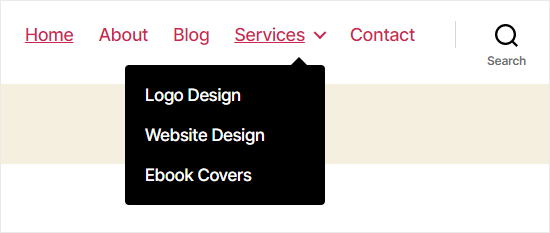
Drop-down menus, sometimes called nested menus, are navigation menus with parent and child menu items. When you run your cursor over a parent item, all the child items will appear beneath it in a sub-menu.
To create a sub menu, drag an item below the parent item, and then drag it slightly to the right. We’ve done that with 3 sub-items beneath ‘Services’ in our menu:
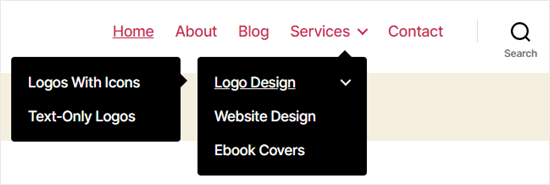
Here’s the sub-menu live on the site:
You can even add multiple layers of dropdown, so that your sub menu can have a sub menu. This can end up looking at bit cluttered, and many themes do not support multi-layer drop-down menus.
In this example, you can see that ‘Logo Design’ (a child item of ‘Services’) has two child items of its own.